How to Plan a Product Photoshoot for Professional Results
- Pieter Nijssen

- Oct 20, 2025
- 9 min read
Over 90 percent of online shoppers say that photo quality is the single most important factor in their buying decision. The right product images set your brand apart and help shoppers feel confident about their purchase. From building trust to communicating your product’s story, mastering a successful photoshoot can turn casual browsers into loyal customers. With the right approach, your planning efforts lead to visuals that impress, inspire, and connect.
Quick Summary
Key Point | Explanation |
1. Define creative goals clearly | Establish specific objectives to guide your photoshoot, ensuring alignment with brand representation and intended visual storytelling. |
2. Assemble a dedicated team | Identify roles and responsibilities for the shoot, ensuring everyone understands their part in executing your creative vision effectively. |
3. Scout locations thoroughly | Choose locations that enhance your product’s story while meeting technical requirements; secure necessary permits for commercial shoots. |
4. Prepare equipment meticulously | Ensure all equipment is ready, including stable surfaces and proper lighting, to achieve high-quality images during the shoot. |
5. Maintain quality control during shooting | Establish a clear image approval process to provide real-time feedback and ensure all images align with your initial creative goals. |
Table of Contents
Step 1: Define creative goals and set objectives
Every successful product photoshoot starts with crystal clear creative goals. Think of this step as your strategic roadmap that transforms a generic photo session into a powerful visual storytelling experience. Your objectives will guide every single decision from lighting and styling to final image selection.
Start by asking yourself critical questions about your product and its intended representation. What emotions do you want these images to evoke? Are you showcasing luxury, approachability, innovation or pure functionality? According to research from UNV Digital, understanding the intended use of your images whether for e-commerce, social media or print marketing is crucial in shaping the shoot’s tone and direction.
Break down your objectives into specific, measurable goals. These might include capturing precise product details, representing true color accuracy, highlighting unique features, or creating images that instantly communicate your brand’s personality. As recommended by product photography experts, your primary focus should be on accuracy and visual appeal. This means creating high resolution images that present your product in the most flattering light without misleading potential customers.
Pro Tip: Create a mood board or visual reference collection that captures the exact style and feeling you want to achieve. This will help your photographer understand your vision instantly.
Consider developing a structured shot list that outlines exactly what images you need. This could include multiple angles, close-up detail shots, lifestyle images showing the product in use, and standard e-commerce style product shots against a clean background. By defining these goals upfront, you eliminate confusion and ensure a focused, efficient photoshoot.
Here’s a comparison of core objectives for different product photoshoot goals:
Goal Type | Key Focus | Example Objectives |
E-commerce | Accuracy Consistency | True color No background Multiple angles |
Social Media | Visual appeal Brand mood | Lifestyle context Unique props Storytelling |
Print Marketing | High detail Impact | Large format Fine textures Dramatic lighting |
Brand Campaign | Personality Emotion | Mood board match Distinct theme On-brand visuals |
Your next step will involve selecting the right photographer and preparing a comprehensive brief that communicates these creative goals precisely. Get ready to translate your vision into a visual narrative that resonates with your target audience.
Step 2: Assemble your team and organize logistics
Building the right team and mapping out your logistical strategy is like orchestrating a complex performance where every player has a crucial role. This step transforms your creative vision from a concept into a actionable plan that will determine the success of your product photoshoot.
Start by identifying the key players for your shoot. According to research from Monkey Business Images, clearly defining roles and responsibilities from the beginning is fundamental. Your core team typically includes a professional photographer or videographer who understands your brand aesthetic, potentially an art director to guide creative vision, styling professionals to prepare products and set design, and assistants to manage equipment and support workflow.
As recommended by Sally Williams Photography, creating a comprehensive treatment document will be your strategic blueprint. This document should outline your shoot concept, include a detailed shot list, feature your mood board, specify required props, and establish precise booking timelines. Experts suggest securing your shoot dates 8 to 10 weeks in advance to ensure availability of your preferred team and locations.
Pro Tip: Always have a backup plan and additional team members who can step in if someone becomes unavailable. Professional productions require flexibility.
Organize your logistics meticulously by developing a production schedule that breaks down every aspect of the shoot. This includes equipment needs, location scouting, wardrobe and prop preparation, lighting requirements, and a minute-by-minute breakdown of shooting sequence. Establish clear communication channels and create an image approval workflow that keeps all team members aligned with your creative goals.
Your next step involves finalizing your detailed production brief and conducting a pre-shoot planning meeting to ensure everyone understands their role and the overall vision. Get ready to transform your carefully laid plans into stunning visual content.
Step 3: Scout locations and secure permits
Location scouting is more than just finding a pretty backdrop. It is about creating the perfect environment that tells your product’s story and meets all your technical and creative requirements. This critical step will set the foundation for capturing images that truly represent your brand’s vision.
According to research from Visual Brand Lab, your location choice dramatically impacts the overall tone and lighting consistency of your photoshoot. You will need to decide between indoor studio settings and outdoor environments based on your specific product and creative objectives. Professional platforms like Peerspace can help you discover unique spaces that align perfectly with your brand aesthetic.
As recommended by Bethany Lavin Photography, consider the practical aspects of your location selection. Will you need seamless backdrops for clean product shots? Are lifestyle settings like a modern kitchen or natural outdoor scenes more appropriate? Your location should complement your product and enhance its visual storytelling. Professional studios offer controlled environments with consistent lighting and minimal distractions while outdoor or lifestyle locations can provide context and emotional depth to your images.
Pro Tip: Always visit potential locations in person and take test shots to understand how lighting changes throughout the day and how your product will look in that specific environment.
Securing proper permits is equally important. Research local regulations for commercial photography in your chosen location. Public spaces often require advance permission and may have restrictions on professional shooting. Private venues typically need formal booking and might have specific usage guidelines. Communicate clearly with location managers about your shoot requirements including team size equipment needs and expected duration.
Your next step involves finalizing location details scheduling location scouts and obtaining necessary permits. Prepare to transform these carefully selected spaces into the perfect canvas for showcasing your product.
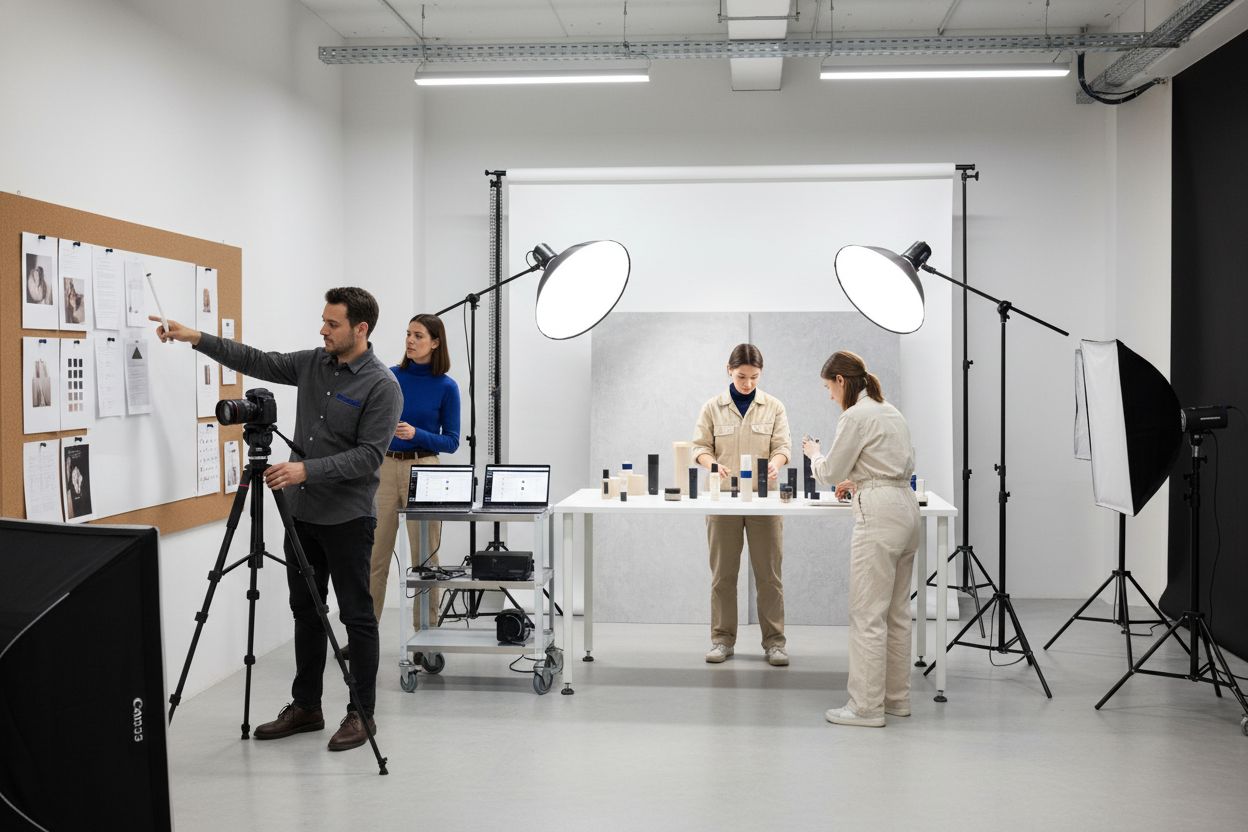
Step 4: Prepare equipment and set up scenes
Creating professional product images requires more than just talent. It demands precise equipment and thoughtful scene preparation that transforms your creative vision into stunning visual reality. This step is where technical precision meets artistic expression.
According to research from E-commerce Fast Lane, your equipment arsenal should include some key essentials. Start with a stable table and seamless sweep backgrounds that can be carefully taped to create smooth curved surfaces. Poster board or seamless paper works perfectly for creating clean uncluttered backgrounds that keep the focus squarely on your product.
Lens selection is crucial. Professional photographers recommend versatile options like a 24 to 70 mm f/2.8 lens for flexibility and a 50 mm f/1.8 for crisp detail shots. Lighting equipment will make or break your images. Consider investing in lightboxes or setting up near large windows to leverage natural light. Supplementary tools like reflectors and foam boards become your secret weapons for controlling light intensity and direction.
Pro Tip: Always do a test shoot with your equipment before the actual photoshoot to understand how different settings impact your product’s appearance.
Scene setup requires meticulous attention to detail. Position your product strategically on the background ensuring perfect alignment and minimal shadows. Use additional props sparingly they should complement not distract from your main subject. Pay close attention to angles and height to showcase your product in its most flattering perspective.
Learn more about professional shoot planning in our comprehensive guide on film production to elevate your visual storytelling skills.
Your next step involves fine tuning lighting and conducting initial test shots to confirm your scene composition meets your creative objectives. Prepare to transform your carefully prepared setup into compelling product imagery.
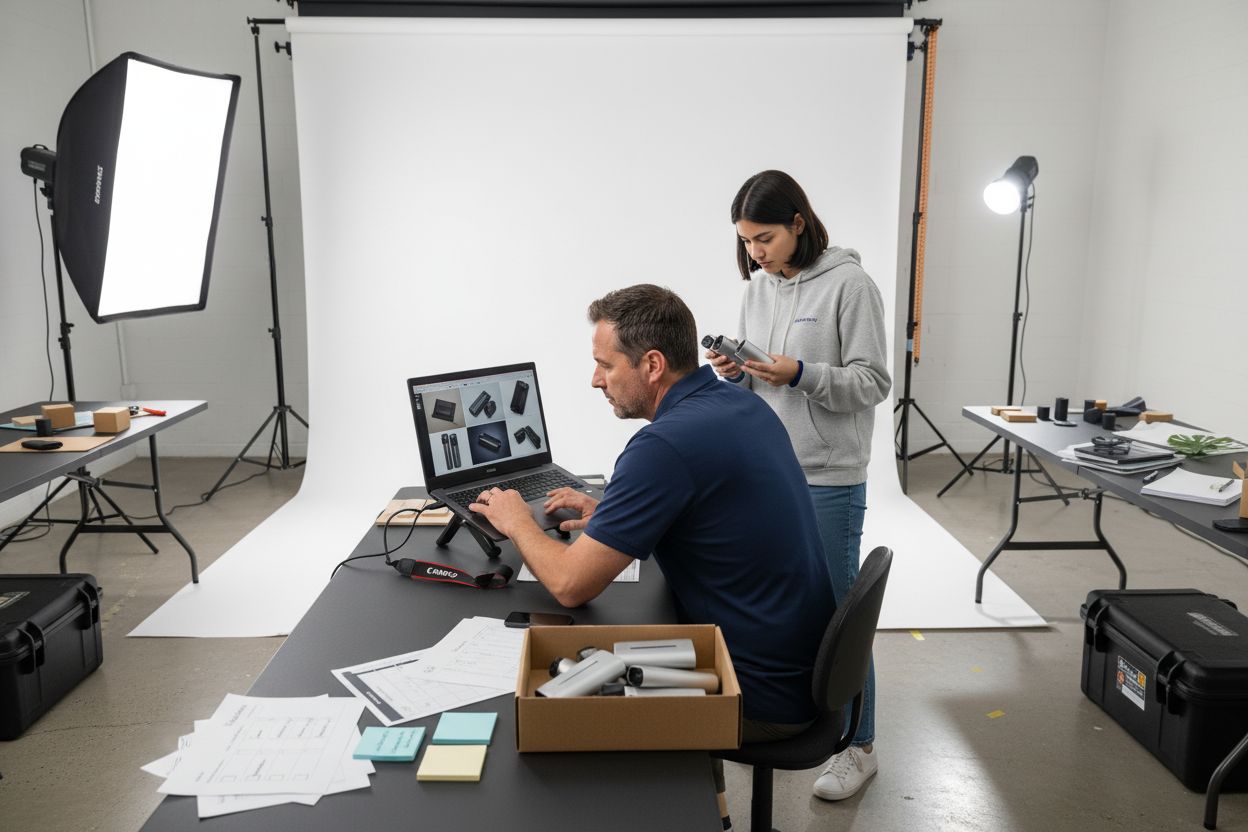
Step 5: Execute shoot and supervise quality control
The photoshoot day is where your meticulous planning transforms into visual magic. This critical stage demands your full attention precision and proactive quality management to ensure every image meets your highest standards.
According to Sally Williams Photography, establishing a clear image approval process is fundamental. You have multiple options for real time feedback clients can attend in person review images on set provide immediate virtual feedback via email or messaging platforms. This approach guarantees instant quality checks and prevents potential misalignments with your creative vision.
Before pressing the shutter button perform a thorough product inspection. As recommended by Karen Young Photography quality control starts with the physical product itself. Examine each item meticulously ensuring they are absolutely pristine clean and free from dust scratches or imperfections. Pro photographers always recommend having duplicate or backup items ready in case of unexpected damage or setup complications. This strategy helps avoid frustrating delays or costly reshoots.
Pro Tip: Create a systematic checklist for each product shot including specific angles lighting conditions and required details to maintain consistent quality across all images.
During the shoot maintain constant communication with your photographer. Review images immediately after capture zooming in to check sharpness color accuracy and alignment with your original creative concept. Be prepared to make real time adjustments to lighting product positioning or camera settings. Your active supervision is key to achieving professional results.
Discover advanced techniques for managing complex shoots in our comprehensive video production guide to elevate your production skills.
Your next step involves carefully reviewing and selecting the best images creating a streamlined workflow for post production editing. Prepare to transform your raw captures into polished professional product imagery.
Want Stress-Free Professional Product Shoots in Switzerland?
Perfect product photography demands clear objectives, the right team, secure permits, and flawless logistics. But turning a creative vision into reality can be overwhelming—especially when dealing with language barriers, local permissions, or last-minute crew needs. If reading about the detailed steps in planning a flawless product photoshoot made you realize how much can go wrong without proper coordination, you are not alone. Many brands struggle to manage all the critical details like location scouting, equipment readiness, and executing a seamless shoot.
Take the pressure off and work with experts who know every corner of the Swiss production scene. With over 20 years of reliable local experience, our team at Video Production Switzerland handles everything for you, from securing permits to sourcing trusted crews and managing on-site logistics. Ready to get stunning, professional product photos that match your creative storyboard—and meet your deadlines? Book a free consultation today and let us deliver a photoshoot that exceeds your expectations, every step of the way.
Frequently Asked Questions
What are the first steps to plan a product photoshoot?
Start by defining your creative goals and objectives. Clearly articulate what you want the images to convey, such as specific emotions or features, and then break these down into measurable goals.
How do I select the right location for my product photoshoot?
Choose a location that enhances your product’s story and meets your technical needs. Visit potential sites in person, take test shots, and ensure the environment aligns with your brand’s aesthetic.
What equipment do I need for a professional product photoshoot?
Ensure you have the essential equipment, including stable tables, seamless backdrops, and versatile lenses. Conduct a test setup with your gear to confirm that each piece functions as needed before the shoot day.
How can I maintain quality control during the photoshoot?
Establish a clear image approval process to check compliance with your creative vision while shooting. Create a checklist for each shot to ensure consistent quality across all images and be ready to make immediate adjustments.
What should I include in my shoot brief for the photographer?
Your shoot brief should outline the shoot concept, include a detailed shot list, and present your mood board. This helps your photographer understand your vision and aligns everyone involved in the production.
How do I prepare for potential challenges during the photoshoot?
Have a backup plan in place, including additional team members, duplicate products, or alternate venues. Prepare to adapt to any issues that arise to maintain workflow and prevent delays in achieving your desired results.
Recommended
