
Documentary Interview Techniques: A Filmmaker's Practical Playbook

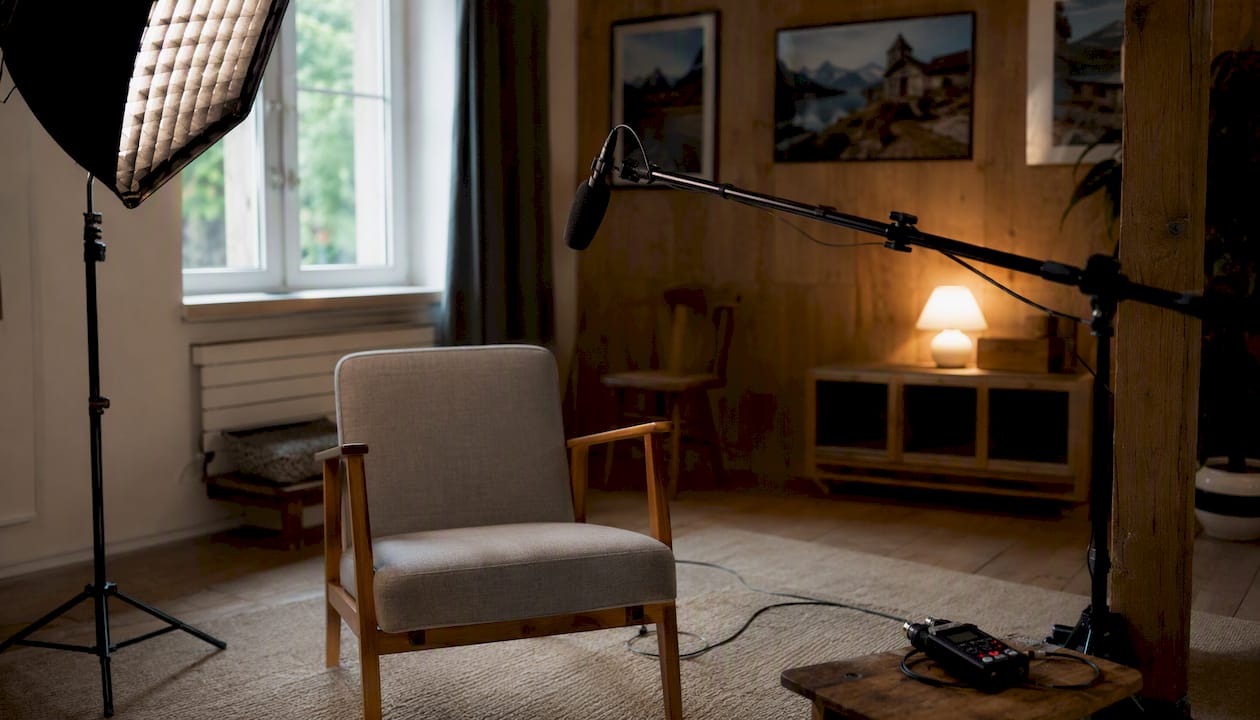
Every strong documentary interview comes down to eight non-negotiable moves: build rapport before you roll, go audio-first with your mic choice, record room tone and a backup track, use a single soft key light, design open-ended questions organized by theme, confirm consent and releases on arrival, plan your B-roll before you shoot, and review your footage immediately after. Get those eight right and you walk away with edit-ready, truthful material every time.
Your on-set checklist:
Build rapport with a pre-interview call and a brief warm-up chat on arrival
Choose your microphone for clean dialogue first, aesthetics second
Record at least 20 seconds of room tone at the start and end of every session
Run a backup audio device on a separate channel
Set a single bright, soft key light before touching the camera
Organize questions into themes with three to four open-ended prompts per theme
Confirm the release and explain final-cut control before rolling
Schedule a B-roll block and a post-interview playback review
Pro Tip: The deepest, most candid answers often surface during the warm-up period before you call “rolling.” Keep a backup recorder running from the moment your subject sits down, as recommended by the International Documentary Association.
These principles are backed by practitioners at the Sundance Collab, the International Documentary Association, and the production support team at Videoproductionswitzerland.
Key Takeaways
Strong documentary interviews depend on three non-negotiable priorities: trust built before you roll, audio captured without compromise, and answers designed to stand alone in the edit.
Point | Details |
Pre-interview preparation | A 20-minute pre-interview call reduces nervousness and surfaces usable story threads before the shoot. |
Audio-first technical setup | Record room tone for at least 20 seconds, run a backup device, and choose your mic for clean dialogue above all else. |
Open-ended question design | Organize questions into themes with three to four prompts each; let subjects repeat the question inside their answer for edit-ready soundbites. |
Consent and transparency | Confirm release terms on first contact and again on the day; explain final-cut control clearly to build trust and protect both parties. |
B-roll and editorial planning | Schedule a dedicated B-roll block after the interview and label every clip by theme to reduce editorial retrieval time. |
Table of Contents
How do you design questions that produce usable documentary answers?
What technical setup gives you the best audio and image for documentary interviews?
How do you manage location and shoot-day logistics without losing time?
What do you owe your subjects ethically, and what should releases cover?
Why does B-roll planning matter as much as the interview itself?
Why audio-first and single-key-light setups are industry best practice
How does preparation shape a documentary interview?
Pre-interviews reduce on-camera nervousness and surface the story threads worth pursuing on the day. That single payoff justifies every hour you spend before the shoot.
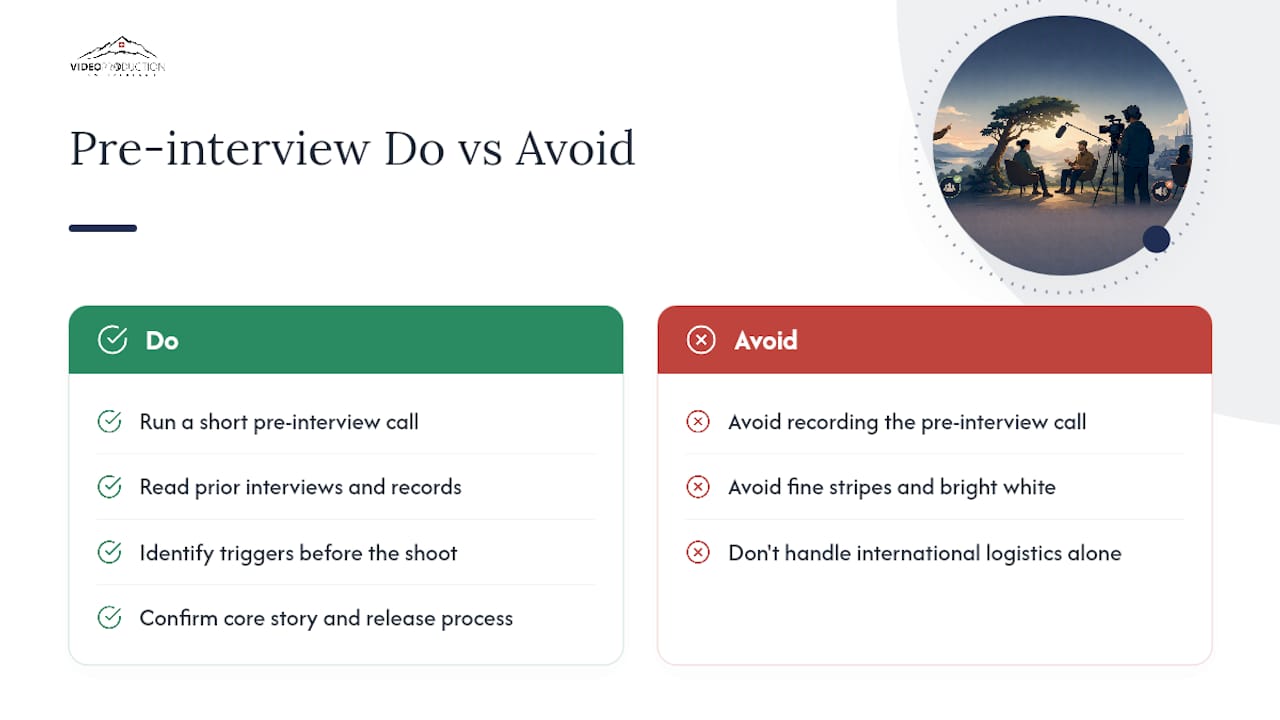
Start with biography. Read prior interviews, published writing, social media, and any public records relevant to your subject. For expert subjects, focus on their published positions and where they diverge from consensus. For vulnerable subjects, go deeper: understand their relationship to the topic emotionally, not just factually, and identify potential triggers before you walk in the room. Director Geeta Gandbhir recommends pre-interviews precisely because they build the trust that makes recorded sessions truthful rather than performative.
Run your pre-interview as a short, low-stakes phone or video call. Aim for a duration sufficient to cover key topics comfortably. Cover three things: confirm the subject’s core story thread, identify any topics they are not comfortable discussing on camera, and explain the release process so there are no surprises on the day. Also confirm wardrobe guidance (avoid fine stripes and bright white), location, and arrival time.
Here is a sample pre-interview email you can adapt:
Subject: Quick prep call before your interview Hi [Name], Thank you for agreeing to be part of this project. Before we meet on [date], I’d love a 20-minute call to walk you through what to expect. We’ll talk through the themes I’d like to explore, answer any questions you have, and I’ll explain how the footage will be used and what rights you’ll be granting. Nothing you say on that call is recorded. The goal is simply to make sure you feel comfortable and prepared. Would [day/time] work for you?
Pro Tip: Ask one open question at the end of your pre-interview call: “Is there anything you’d like me to know before we start?” Subjects often share the most useful context — and the most sensitive boundaries — in that final minute.
For international shoots where logistics add complexity, a full-service production partner can handle location scouting, permits, and local crew coordination so your pre-interview energy stays focused on the subject, not the shoot-day logistics.
How do you design questions that produce usable documentary answers?
The single most reliable principle: use open-ended, context-embedded prompts that let the subject repeat the question inside their answer. “Tell me about the day you arrived” produces a standalone soundbite. “Was it hard?” produces a yes or no that is useless in the edit.
The NFB’s interview guidance recommends organizing questions into themes, with three to four starter prompts per theme, and avoiding yes/no questions entirely. Structure your interview as a “grand tour” first: broad, orienting questions that let the subject place themselves in the story. Then move into deep-dive prompts that target specific moments, emotions, and consequences.
Question types to build into every theme:
Starter prompts: “Walk me through what happened the first time you…” / “Describe what a typical day looked like during…”
Behavioral probes: “What did you actually do when…?” / “How did you respond in that moment?”
Sensory follow-ups: “What do you remember seeing / hearing / feeling when…?”
Consequence questions: “What changed after that?” / “How did that affect the people around you?”
Emotional anchors: “What was the hardest part of that period?” / “What do you wish you had known then?”
Structured-interview research from Google’s re:Work program shows that predetermined follow-up questions and documented probing ranges improve consistency across multiple subjects covering the same topic. That principle translates directly to documentary work: decide in advance which follow-ups are permitted for each theme, so you probe fairly without leading.
The OPM structured-interview guide adds another useful adaptation: pilot-test your questions on a colleague before the shoot. A question that sounds open in your head often reveals itself as leading when you say it aloud.
Pro Tip: When a subject gives a great answer but starts mid-thought, ask them to begin again with a full sentence: “Could you say that again starting from the beginning, as if I hadn’t asked?” That single move saves hours in the edit room.
What technical setup gives you the best audio and image for documentary interviews?
Sound is non-negotiable. A slightly soft image is fixable in post; a noisy or distorted audio track is not. Choose your mic configuration for clean dialogue first, then optimize the camera.
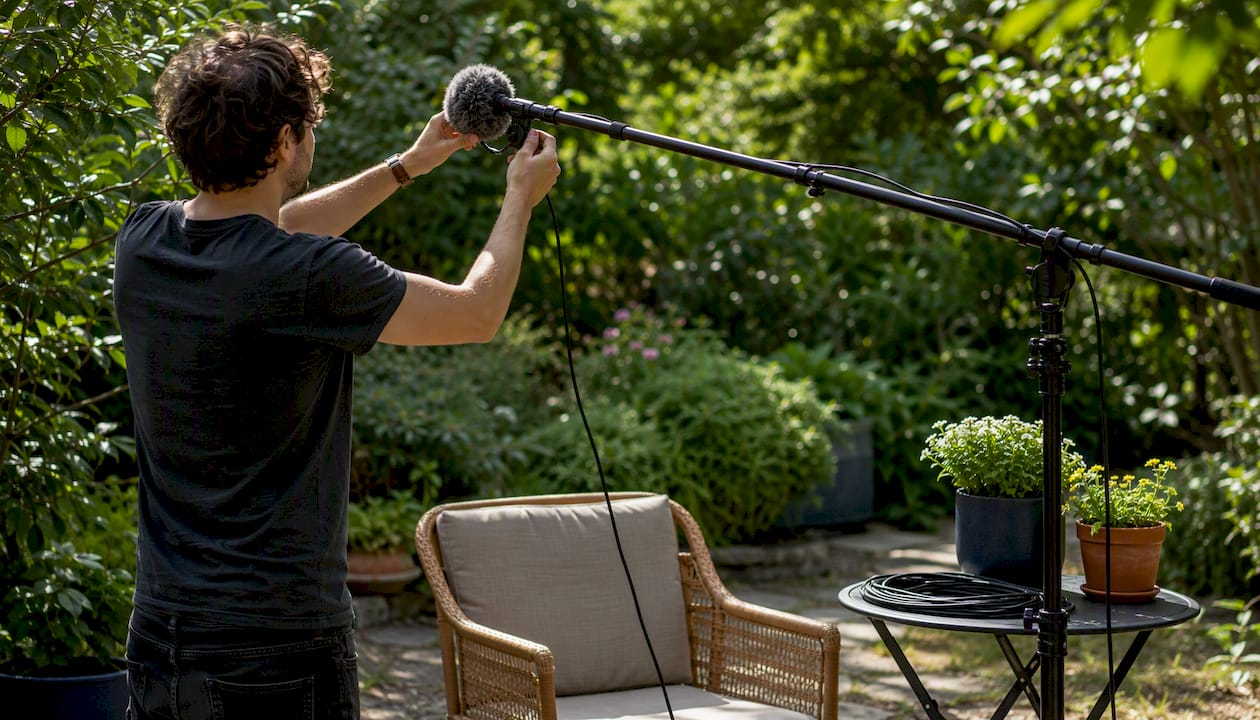
The International Documentary Association’s step-by-step guide recommends prioritizing audio over visuals, recording room tone, and capturing a backup track. Here is how the three main mic setups compare:
Setup | Sound Quality | Mobility | Main Risk | Best Use |
Shotgun (boom) | Excellent | Moderate | Operator error, off-axis noise | Controlled indoor locations, two-person crew |
Lavalier (lav) | Very good | High | Clothing rustle, concealment time | Run-and-gun, single-person crew |
Dual (shotgun + lav) | Best redundancy | Low | More cables, longer setup | High-stakes interviews, no retake option |
For one-person crews, a lav clipped to the subject’s collar and routed to a small recorder like a Zoom H5 or Tascam DR-10L gives you clean dialogue without a boom operator. When you have a second crew member, add a shotgun on a boom as your primary and treat the lav as insurance.
Monitoring matters as much as mic choice. Use headphones throughout the interview, not just during the mic check. Record dual channels: one at nominal level, one pulled down 6–10 dB as a safety track. And always capture room tone.
For lighting, a single bright, soft key light placed at roughly 45 degrees to the subject’s face creates a cinematic look while cutting setup time significantly compared to a full three-point rig. The IDA guide supports this approach: it keeps the subject comfortable, reduces the “studio” feeling that makes people stiffen up, and leaves room for natural ambient fill from windows or practicals.
Camera framing: place your subject’s eyes at the upper third of the frame. Shoot at f/2.8 to f/4 to keep the face sharp while blurring the background enough to separate subject from environment. For shot variety, set a second camera at a wider angle or a slightly different eyeline. More on framing options is covered in this guide to documentary interview camera angles.
Pro Tip: Pack two of everything that can fail: spare batteries, a second memory card, a backup lav cable, and a roll of medical tape for securing lavs to skin. A single dead battery has ended more interviews than bad questions ever have.
How do you build trust and get honest answers on camera?
Effective interviewing is active listening plus patient silence. Most filmmakers talk too much. The ones who get the best material know when to stop.
Rapport starts before you roll. Spend the first five to ten minutes on arrival talking about anything except the interview topic: the drive over, the room, a detail you noticed about their space. MovieMaker’s guide to great interviews recommends sequencing easier questions first and saving harder or confrontational questions for later. That sequencing is not just courtesy; it is strategy. A subject who has answered ten comfortable questions is physiologically and emotionally more open when you reach the difficult ones.
On-camera conduct rules that produce better material:
Let silence sit. After a subject finishes an answer, count three seconds before speaking. That pause often produces the most honest follow-up.
Mirror, don’t lead. Repeat the last three words of their answer as a question: “You felt responsible?” That invites elaboration without suggesting a direction.
Nod but don’t affirm verbally. “Mm-hmm” and “right” are unusable in the edit and train subjects to stop after each sentence waiting for your approval.
When an answer is evasive, don’t push immediately. Ask a related question from a different angle, then return.
If an answer is technically unusable (started mid-thought, too quiet, interrupted), stop and ask for a retake: “That was great — could you say that one more time from the top?”
Sensitive topics need a different pace. Introduce them after the subject is settled, never in the first third of the interview. Give explicit permission to pause: “If you need a moment at any point, just say so.” That permission alone reduces the chance of a subject shutting down.
Pro Tip: Before you ask the hardest question, say it out loud to yourself in the car. If it makes you uncomfortable, it will make your subject uncomfortable. Reframe it as an invitation rather than a challenge: “I’d love to understand what that period was like for you” lands very differently than “Why did you make that decision?”
How do you manage location and shoot-day logistics without losing time?
Book 30 minutes of buffer before every interview: 15 for setup, 15 for the subject’s warm-up. Protect that time. It is not slack; it is where the interview actually begins.
Location checklist before you commit to a space:
For one-person crews, run setup in this order: place the key light first (it takes longest to adjust), then mic the subject, then set the camera. Do your mic check with the subject speaking at interview volume, not a whisper. Record room tone before the subject leaves the chair.
Document release status on a simple shoot sheet: subject name, date, release signed (yes/no), any agreed restrictions. Schedule a five-minute post-interview playback immediately after wrapping. Watch the last two minutes of footage with headphones. If audio or framing is off, you still have the subject in the chair.
For international productions where location scouting, permits, and local crew coordination are genuine logistical challenges, Videoproductionswitzerland handles all of that so your shoot day runs on time. You can review production support services to understand what a full-service partner covers.
What do you owe your subjects ethically, and what should releases cover?
Always be transparent about how footage will be used and who controls the final cut. Say it out loud on first contact, repeat it on the day, and put it in writing. That transparency is not just ethical; it is what gets you honest answers.
Essential release elements to confirm before and on the day:
How the footage will be used (film, online, broadcast, educational)
Rights granted (perpetual, non-exclusive, or limited term)
Anonymization options (voice alteration, silhouette, pseudonym)
Whether the subject can review their segment before release
Who holds final-cut control and what that means practically
For trauma-informed interviewing, pacing is everything. MovieMaker’s guidance on interviewing vulnerable people stresses the importance of permission and transparency. Keep sessions with trauma survivors to 60 minutes or less. Offer breaks every 20 minutes. Have a support contact available, either a counselor or a trusted person the subject can call after the session.
When a subject requests changes after the interview, respond in writing within 48 hours. If they want a segment removed and it has not yet been edited into a cut, honor the request without negotiation. If the footage is already in a locked cut, explain what is possible and document every exchange. The relationship matters more than any single clip.
Why does B-roll planning matter as much as the interview itself?
Capture intentional B-roll tied directly to the interview’s themes. Without it, you are locked into a talking-head structure that limits your editorial options and reduces emotional impact.
The eight B-roll types editors reach for most often: hands at work, environmental establishing shots, archival photographs or documents, observational moments (subject in their natural context), reaction shots, detail inserts (objects mentioned in the interview), location cutaways, and archival or news footage. DocFilmAcademy’s visual storytelling guide makes the case that observational footage and archive let the image carry emotional weight that interview clips alone cannot.
Schedule B-roll in a separate block, after the interview, when the subject is relaxed and the sound environment is already mapped. Observational moments (subject walking, working, interacting) are more valuable than staged inserts; prioritize them. When fresh B-roll is impossible, photographs and archival material can carry a sequence just as effectively.
Label every B-roll clip at the time of capture: subject name, location, theme it supports, and take number. That 30 seconds of logging saves hours when an editor is searching for the shot that covers a specific interview claim.
Your day-of kit checklist and interview schedule template
A complete day-of checklist and a clear schedule reduce shoot-day mistakes and protect your audio. Print both and keep them on your phone.
Day-of kit checklist:
Primary microphone (shotgun or lav) plus one spare
Backup recorder (Zoom H5, Tascam DR-10L, or equivalent)
Spare batteries for every device (camera, recorder, light)
Two memory cards, formatted and labeled
Spare lav cable and XLR cable
Medical tape and gaffer tape for lav concealment
Headphones for monitoring
Release forms (printed and digital backup)
Shoot sheet for logging takes and release status
Room tone reminder (sticky note on camera: “Record room tone”)
Sample interview schedule (90-minute block):
0:00 to 0:15 — Setup: light, mic, camera, room tone check
0:15 to 0:25 — Subject arrival, warm-up conversation, mic and wardrobe check
0:25 to 0:30 — Pre-roll: informal chat, confirm release, explain the process
0:30 to 1:00 — Recorded interview (30 minutes maximum for sensitive subjects)
1:00 to 1:05 — Room tone (end of session), immediate playback check
1:05 to 1:20 — B-roll block with subject
1:20 to 1:30 — Buffer for retakes, wrap, and release confirmation
Copyable sample questions:
“Walk me through the moment you first realized something had changed.”
“What did you do next, and why?”
“What do you want people to understand about that experience that they usually get wrong?”
Sample release snippet:
“I consent to the use of my recorded interview in [project title] for [distribution channels].”
“I understand I may request anonymization by [method] before final delivery.”
Why audio-first and single-key-light setups are industry best practice
The research-backed rationale is straightforward: bad audio is unrecoverable in post, and a single soft key light produces a cinematic look while keeping setup time short enough for small crews to stay focused on the subject.
The IDA’s documentary interview guide is the clearest industry statement of the audio-first principle: prioritize clean dialogue, record room tone, use a shotgun mic when conditions allow, and always capture a backup track. That guidance reflects decades of editorial experience: a film can survive a slightly underexposed image, but it cannot survive an interview track buried in HVAC noise.
The NFB’s interview tips add the question-design layer: pre-interviews, themed question sets, and answers that stand alone in the edit are the structural equivalent of clean audio. They make the interview usable before it reaches the editor.
Geeta Gandbhir’s Sundance Collab interview frames the whole approach memorably: interviews are the bones of a documentary. Deep research, pre-interviews, and ethical safety are non-negotiable for getting truthful, usable material.
Pro Tip: Use sourced best practice as your starting point, then adapt to the story and the subject. No framework survives contact with a subject who takes the interview somewhere unexpected. The checklist gets you ready; your listening gets you the material.
What an experienced documentary shooter actually thinks about interview days
The pre-roll is where the best material surfaces. Every experienced shooter I know treats the 10 minutes before “rolling” as the real warm-up window: the subject is present, the pressure is low, and the most candid observations come out naturally. The practical implication is simple: run a backup recorder from the moment the subject sits down, and keep the conversation going right through the transition to the formal interview so the subject never feels the shift.
Two other things matter more than most guides admit. First, your listening posture shapes the subject’s answers. If you are scanning your question sheet, they feel it and tighten up. Put the sheet down after the first theme and trust your preparation. Second, the release conversation is not a formality. Done well, it is the moment the subject decides whether to trust you. Take three minutes, explain what you are making and why their story matters, and answer every question they have. That investment pays off in every answer that follows.
Sources
The sources below back the specific claims made throughout this guide. Place each citation at the point in your article where you state that source’s finding.
Recommended
